Step-by-Step Golf Address
Golf Grip
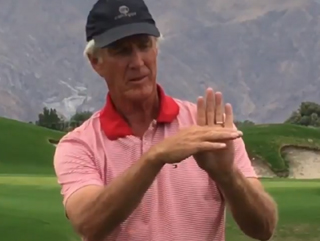
Look at your left hand find where the fingers join the palm, the base of your fingers. Now lay the upper portion of the grip in the base of the fingers of the left hand (right hand golfer). Find the upper thumb joint of the left hand. Find the life line on the right hand. Extend the right hand straight out to the side. Move it towards the club. The top of the life line of the left hand forms a pocket that fits into the upper thumb joint.
Position Hands
Repeat the simple grip. Pronate the left forearm/hand to 45 degrees. The right hand will follow along, supinating 20 – 45 degrees. With this grip, all your fingers are touching the grip. (Ten Finger Grip)
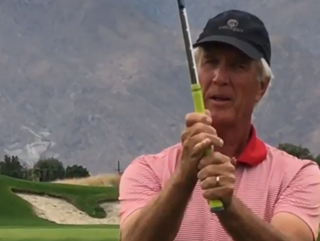
Decided which grip works for you. All ten finger tips contact the grip. (Ten Finger Grip). At this point you may interlock or intertwine the little finger of your right hand with the index finger of your left hand. (Interlocking Grip). Alternately slide the little finger of the right hand over the top of the index finger of your left hand placing it in-between that index and the middle finger of the left hand. (Overlapping Grip).
Close the gaps. The base of the fingers of both hands where the fingers join the palm contact the grip. The thumbs have multiple points of contact with the grip. Your right index finger and thumb are pinching fingers. Pinch the fingers against the club shaft. The top of the thumb of the left hand is in contact with the right palm. The base of the hypothenar, muscle pad, of the left-hand contacts the grip.
Positioning the Feet
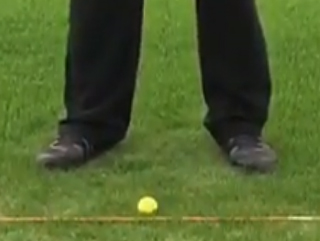
Align The Feet: Feet: The outside of the foot is aligned perpendicular to the ball line. Aligning the outside line of each foot perpendicular to the ball line will allow the knees to comfortably drop slightly inward. Heels: Heels are placed about 12” – 15“apart. Heel width is adjusted for height of golfer. Heel width is adjusted for club length, i.e. with the wood heels are placed about 15” and for irons, the heels are placed about 12” apart.
Toes: Keep the left (target side) foot heel in place but swivel toe end toward target. Toes adjusted outward based on the flexibility of hips, back, etc. i.e. more for less flexibility. Similarly, with the right foot. You may want to open the toe end up a bit. It will help with hip rotation. Amount of openness is based on golfer’s flexibility to rotate the hips around the spine during the backswing.
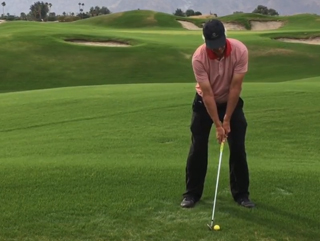
Posture
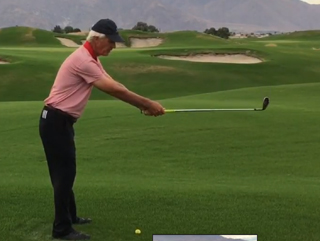
Bow over from the waist. Now bend the knees until they catch. Tuck the tailbone. Place the club in your hands parallel to the ground. Then, place the club on the ground with the elbows hanging straight down from the shoulders. The upper and mid thorax or upper back and shoulders are relaxed, slightly rounded. Swivel the head slightly to the left at address. Cock the head very slightly right. The goal is to keep both eyes on the ball during the entire backswing. Keep your eyes on the ball. Point the nose, chin, forehead and eye sockets at the ball. Your entire face looks at the ball not just your eyeballs.
Keep Your Eyes on the Golf Ball
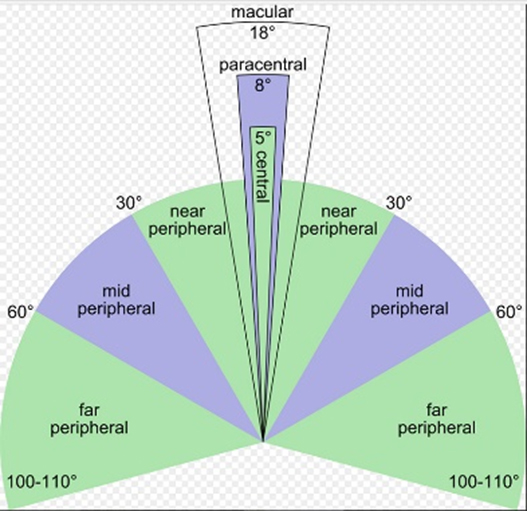
Keep both eye sockets facing the ball to improve accuracy. We see most accurately when both eyes are looking straight ahead. During the backswing swing, many (right handed) golfers with limited flexibility, will swivel their head away, from the target to the right. Swiveling the head too much right during the backswing gives a skewed view of the target resulting in shot inaccuracy. The solution is to swivel the head slightly to the left at address. The goal is to keep both eyes on the ball during the entire backswing. Keep both eye sockets facing the ball during the entire backswing and through impact. The closer your view of the ball is to the central vision field the better your ability to sense the position, location, orientation and movement of your body and its parts in space.
Stance Alignment
Establish your baseline alignment. The baseline is the line from the ball to the target. The golf ball is in the middle of the stance for a standard shot alignment. Align the heels parallel to the base line. Parallel feet are placed about 12” – 15“apart. Heel to heel width is adjusted for height of golfer, taller golfers use a wider stance, shorter golfers a narrower stance. Heel to heel width is adjusted for club length, i.e. with the wood heels are placed about 15” and for irons, the heels are placed about 12” apart. The outside line of the foot is perpendicular to the base line and heel line, allowing the knees to drop into the proper position, slightly inward. Establish your golf posture alignment. Bow over from the waist. The hips are parallel to the base line. Bend the knees until they catch and are parallel to the baseline. Shoulders relaxed and slightly rounded are parallel to the baseline. The center between the hips, the sternum and the center point between the eyes are aligned, centered with each other and the golf ball in a standard setup.
Align the Golf Club
Grip the club. Place club face directly behind the golf ball. The leading edge of the sole of the club is perpendicular to the base line. Elbows hang straight down from the parallel shoulders. The back of the left arm is parallel to the baseline pointing to the target. The right elbow points to the right hip. The butt end of the club is even with the inside of the left thigh.
PGA Instructor Mike Cahill and PGA Master Instructor Dave Cahill are here to help you play better and enjoy the game more. Please come see us in Palm Springs CA for golf lessons or visit us for a Palm Springs, CA or Las Vegas, NV Golf School.
PGA Instructor Mike Cahill 612-501-9015 mikecahill@cahillgolf.com
PGA Master Instructor Dave Cahill 952-994-0387 davecahill@cahillgolf.com